In this page you can see some simple projects that I have made with Arduino!

Here we have another project with arduino that is a bit more complex than the others!

Project

Arduino code

Processing code

Turning on/off a LED with a keybind:This project is made for turning on or off a LED with a key or a group of keys of the keyboard. In this example I use the key "L", as you can see in the video (0:00-0:33).

int ledPin= 13; // Select the pin.
int status = HIGH;
int val;
void setup() {
beginSerial(9600);
pinMode(ledPin, OUTPUT); // Define the LED as an output.
}
void loop(){
val= serialRead();// lee el valor del puerto seri
if(val!= -1 && val== 'L') { // Define the letter or number to turn on/off the LED
status = !status;
}
digitalWrite(ledPin, status);
delay(100);
}
  

  import processing.serial.*;
Serial port;
void setup() {
 size(255, 255);
 port = new Serial(this, Serial.list()[1], 9600);
}
void draw()
{
background(0);
}
void keyReleased() { Send to the port the key selected.
port.write(key);
}
  
Servo Motor: In this project you can run a ServoMotor, as you can see in the video (0:33-0:47).
/* Sweep
 by BARRAGAN http://barraganstudio.com
 This example code is in the public domain.

 modified 8 Nov 2013
 by Scott Fitzgerald
 http://www.arduino.cc/en/Tutorial/Sweep
*/

#include 

Servo myservo;  // create servo object to control a servo
// twelve servo objects can be created on most boards

int pos = 0;    // variable to store the servo position

void setup() {
  myservo.attach(9);  // attaches the servo on pin 9 to the servo object
}

void loop() {
  for (pos = 0; pos <= 180; pos += 1) { // goes from 0 degrees to 180 degrees
    // in steps of 1 degree
    myservo.write(pos);              // tell servo to go to position in variable 'pos'
    delay(15);                       // waits 15ms for the servo to reach the position
  }
  for (pos = 180; pos >= 0; pos -= 1) { // goes from 180 degrees to 0 degrees
    myservo.write(pos);              // tell servo to go to position in variable 'pos'
    delay(15);                       // waits 15ms for the servo to reach the position
  }
}


  /*
 Controlling servo motor from Processing.
 Processing Version.
 Based on Tom Igoe"s example:
 http://itp.nyu.edu/physcomp/Labs/Servo
 by Berio Molina
 Created 10 May 2008
 */
 
 import processing.serial.*;
 Serial myPort;
 
 color colorButtonR = #222222; 
 color colorButtonL = #222222; 
 
 void setup(){
 size(400, 300);
 println(Serial.list());
 myPort = new Serial(this, Serial.list()[0], 9600); 
 noStroke();
 smooth();
 }
 
 void draw(){
 background(0);
 fill(colorButtonR);
 rect(width-100, 0, 100, height);
 fill(colorButtonL);
 rect(0, 0, 100, height);
 
 if(mouseX<100){
 cursor(HAND);
 if(mousePressed){
 colorButtonL = #284c56;
 myPort.write(1); // send 1 to the serial port
 }else{
 colorButtonL = #222222;
 } 
 }else if(mouseX>width-100){
 cursor(HAND);
 colorButtonR = #284c56;
 if(mousePressed){ 
 myPort.write(2); // send 2 to the serial port 
 }else{
 colorButtonR = #222222; 
 } 
 }else{
 cursor(ARROW);
 } 
 } 
 
Musical scale with a buzzer: Here, we will make the musical scale putting the frequency (Hz) of the different notes, so it is an example if you want to do a song or something like that because you can take the reference of all the notes and make your own essay. You can see it in the video (0:47-1:02).

Musical scale notes frequency:

Arduino code:


    const int pinBuzzer = 9;
 
void setup() 
{
}
 
void loop() 
{
  //do
  tone(pinBuzzer, 261.63);
  delay(1000);
 
  //do#
  tone(pinBuzzer, 277.18);
  delay(1000);
 
  //re
  tone(pinBuzzer, 293.66);
  delay(1000);

  //re#
  tone(pinBuzzer, 311.13);
  delay(1000);

  //mi
  tone(pinBuzzer, 329.63);
  delay(1000);

  //fa
  tone(pinBuzzer, 349.23);
  delay(1000);

  //fa#
  tone(pinBuzzer, 369.99);
  delay(1000);

  //sol
  tone(pinBuzzer, 392);
  delay(1000);

  //sol#
  tone(pinBuzzer, 415.3);
  delay(1000);

  //la
  tone(pinBuzzer, 440);
  delay(1000);

  //la#
  tone(pinBuzzer, 466);
  delay(1000);

  //si
  tone(pinBuzzer, 493.88);
  delay(1000);
}
  
RGB LED: Finally, in this project we will work with a RGB LED and we will need three resistors and a protoboard so we can connect everything, this project is more difficult than the others but it still being very easy. You can see it in the second video.
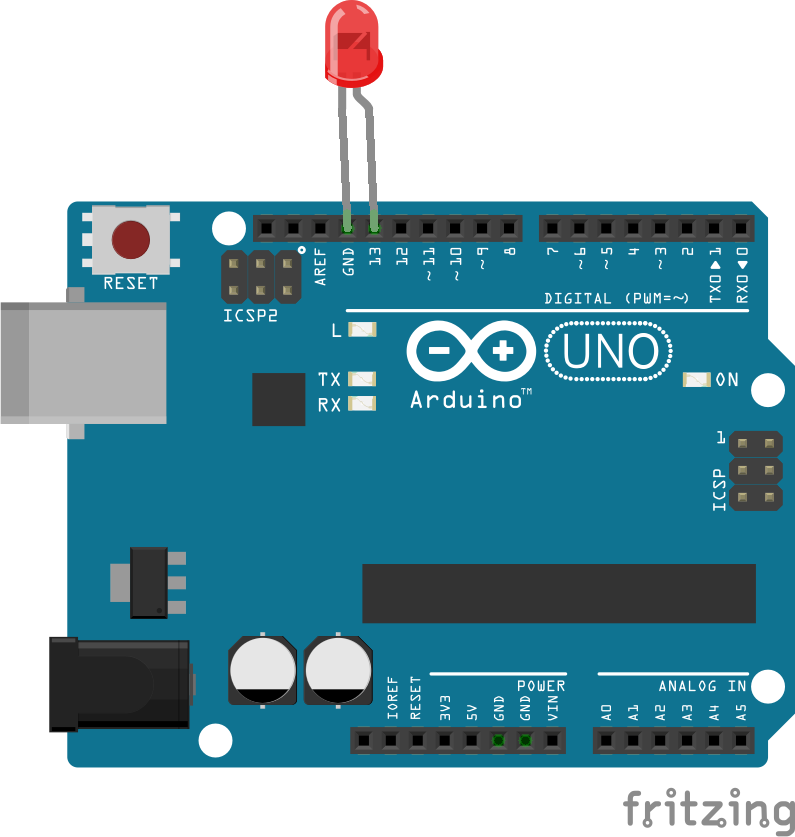
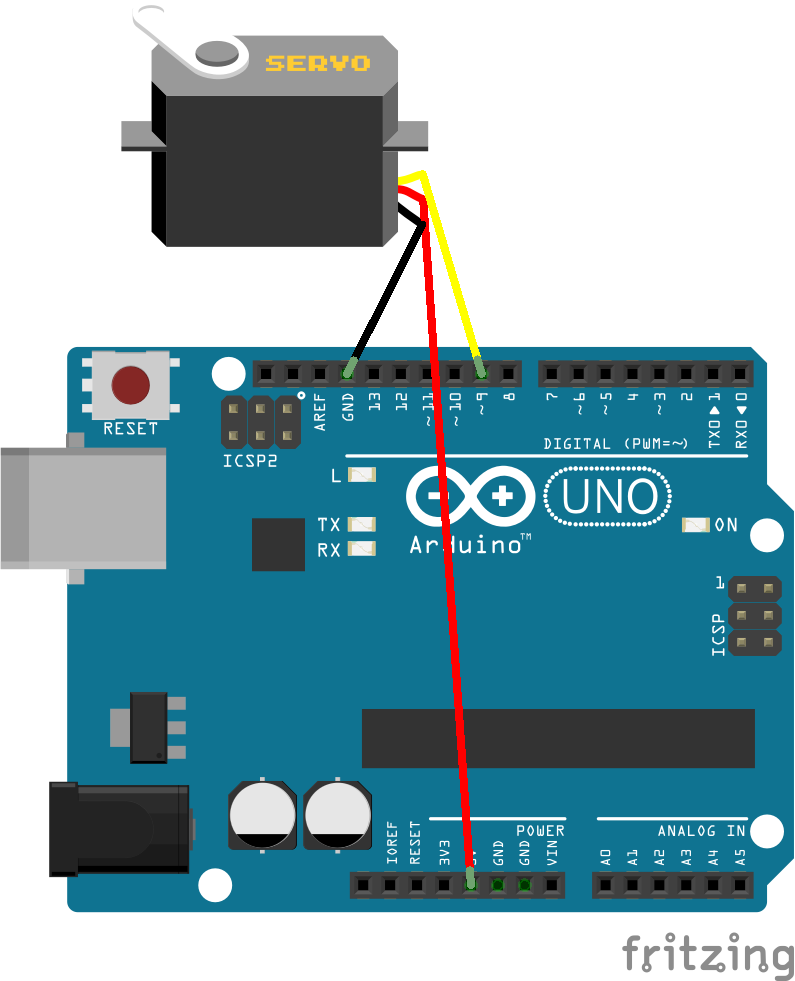
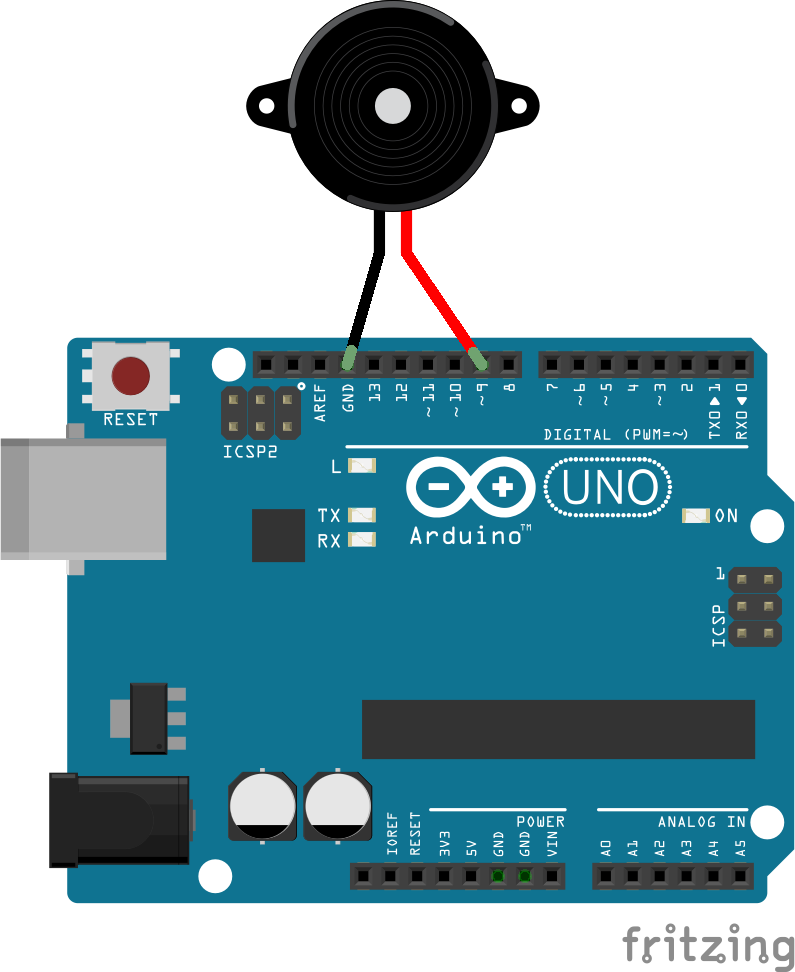
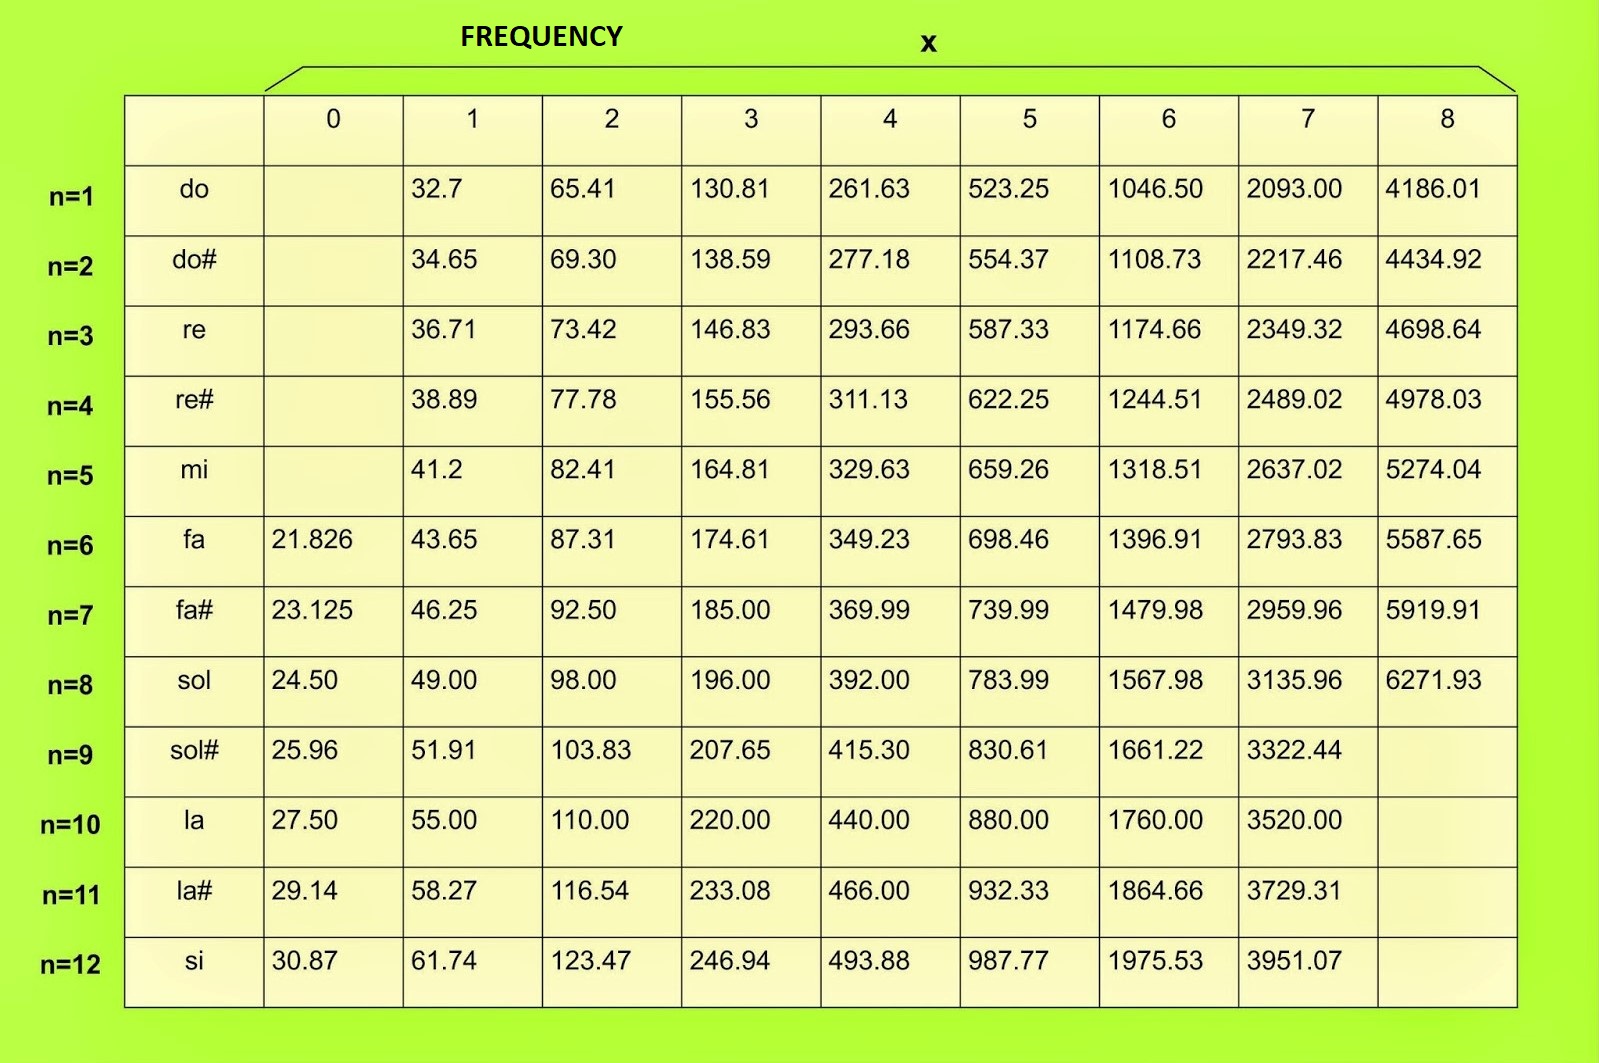
Arduino code:


     // Define Pins
  #define BLUE 3
  #define GREEN 5
  #define RED 6

  void setup()
  {
  pinMode(RED, OUTPUT);
  pinMode(GREEN, OUTPUT);
  pinMode(BLUE, OUTPUT);
  digitalWrite(RED, HIGH);
  digitalWrite(GREEN, LOW);
  digitalWrite(BLUE, LOW);
  }

  // define variables
  int redValue;
  int greenValue;
  int blueValue;
  
  // main loop
  void loop()
  {
  #define delayTime 10 // fading time between colors
  
  redValue = 255; // choose a value between 1 and 255 to change the color.
  greenValue = 0;
  blueValue = 0;
  
  // this is unnecessary as we've either turned on RED in SETUP
  // or in the previous loop ... regardless, this turns RED off
  // analogWrite(RED, 0);
  // delay(1000);
  
  for(int i = 0; i < 255; i ++) // fades out red bring green full when i=255
  {
  redValue += 1;
  greenValue += 1;
  // The following was reversed, counting in the wrong directions
  analogWrite(RED, 255 - redValue);
  analogWrite(GREEN, 255 - greenValue);
  analogWrite(RED, redValue);
  analogWrite(GREEN, greenValue);
  delay(delayTime);
  }
  
  redValue = 0;
  greenValue = 255;
  blueValue = 0;
  
  for(int i = 0; i < 255; i += 1) // fades out green bring blue full when i=255
  {
  greenValue += 1;
  blueValue += 1;
  // The following was reversed, counting in the wrong directions
  // analogWrite(GREEN, 255 - greenValue);
  // analogWrite(BLUE, 255 - blueValue);
  analogWrite(GREEN, greenValue);
  analogWrite(BLUE, blueValue);
  delay(delayTime);
  }
  
  redValue = 0;
  greenValue = 0;
  blueValue = 255;
  
  for(int i = 0; i < 255; i += 1) // fades out blue bring red full when i=255
  {
  // The following code has been rearranged to match the other two similar sections
  blueValue -= 1;
  redValue += 1;
  // The following was reversed, counting in the wrong directions
  // analogWrite(BLUE, 255 - blueValue);
  // analogWrite(RED, 255 - redValue);
  analogWrite(BLUE, blueValue);
  analogWrite(RED, redValue);
  delay(delayTime);
  }
  }

FUTURE PROJECT:

Nowadays, I am trying to make a game with the Green library in Processing taking as an example the "ArenaShoot" example from It. The idea is to connect the Funduino Joystick Shield V1.A and control the character with the controller, in addition, I would like to connect a LED and a buzzer so If you die, the LED would turn on and you will hear a music from the buzzer. Here you can see the Funduino Joystick Shield V1.A.

Here you have the most important part of the code (I am still working on the code, so it's unfinished). You can easily copy it and try it by your own to see if it works.


import net.java.games.input.*;
import org.gamecontrolplus.*;
import org.gamecontrolplus.gui.*;

import cc.arduino.*;

import Green.*;

/*
 Name: Zacchary Dempsey-Plante
 Date: 2018-12-09
 Description: A driving arena shooter. This is a port of a game I originally made for school that was finished 2016-01-28. This is definitely not my cleanest code.
The original game can be found at https://github.com/zedseven/CS-2015-Final-Project.
https://protosupplies.com/product/funduino-joystick-shield-v1-a/
https://forum.processing.org/two/discussion/15312/getting-game-control-plus-to-read-controller
*/

Green green; //"Green" is a Class always Classes are in capital letter and "green" is an object of the Class "Green".
// It creates only a space in the computer memory of this object of this Class.
Arena world;
ControlIO control;
ControlDevice device; 
//Run at the start of the program, used to set everything up for the session
void setup()
{
  fullScreen();
  green = new Green(this); //It creates an object of the Class "Green" with all the properties and methods of this Class.
  world = new Arena(width, height);
  green.loadWorld(world);
  control = ControlIO.getInstance(this); //ControlIO getinstance will be a method of the Class ControlIO.
  device =  control.getDevice("Funduino Joystick");
  device = control.getMatchedDevice("testing2");
 
  if (device == null) 
  {
    println("No suitable device configured"); //println means printline in the console if device is not detected
    System.exit(-1); // End the program NOW!
  }
}
//Run every frame
void draw()
{
  green.handleAct();
  // It goes to the library Green and finds the method handleact and applies to my new created object green. 
  green.handleDraw();
  green.handleMousePosition(pmouseX, pmouseY, mouseX, mouseY);
  green.handleInput();
  println(device.getButton("Button0").pressed());
}
//Allows for easy input-checking
void mousePressed()
{
  green.handleMouseDown(mouseButton); //handleMouseDown is in the Green Class inside the Green library as a method.
}
void mouseReleased()
{
  green.handleMouseUp(mouseButton);
}
void mouseWheel(MouseEvent event) //MouseEvent event are predefined parameterers of the Class MouseWheel
{
  green.handleMouseWheel(event.getCount());
}
void keyPressed()
{
  green.handleKeyDown(key, keyCode);
}
void keyReleased()
{
  green.handleKeyUp(key, keyCode);
}